
As promised, here is a step by step tutorial on how to make the toadstool seating that featured in the Enchanted Woodlands party I threw for Olivia's 6th birthday.
Liquid nails will be your NBFF by the end of this.
What you will need:
- Base of stool 30 x 30cm piece of mdf (I purchased a large piece of mdf from Bunnings and had it cut to size. Bunnings cannot cut circles so you'll need to find someone else)
- Seat 30 dia round piece of mdf (same as above)
- 30x30cm astro turf / faux grass (found mine at Bunnings)
- log or tree stump 30cm long 15-20cm in diameter. Ensure the ends are even and level.
- Foam circles 30cm dia (Clarks Rubber - they cut them for me)
- Red and white spot material (Spotlight)
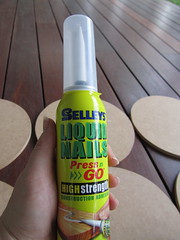
- Liquid nails (Bunnings)
- Light duty stapler/tacker (Bunnings)
- Stanley/exacto knife
- Fabric scissors
- Electric carving knife
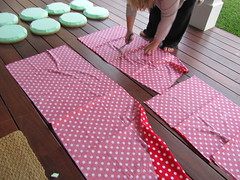
Lay your chosen fabric down and cut squares approx 50cm x 50cm.
Next I took our electric craving knife (I knew I'd kept it all these years for a reason) and trimmed the edges of the foam. Do this on one side only. It will give your mushroom seat a more realistic look.

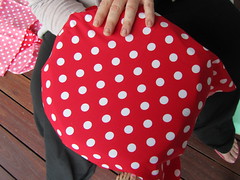
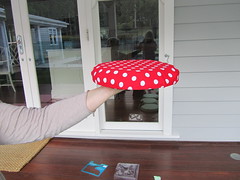
Place fabric right side down, wrong side up on floor then place your foam then round MDF piece on top.
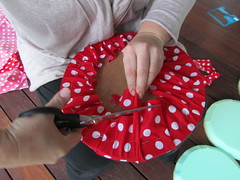
You are going to start stapling the fabric to the underside of the MDF. I started at 12 o'clock, pulled tightly and stapled. Then moved on to 6, 3, 9 o'clock and so on until the entire piece of fabric is secured underneath.

Ensure it's neat and no bunching on the sides before stapling. Keep checking to ensure the top has no pleating or bunching.
Warning: making more than a few of these will give you a dose of RSI.
Once all the stapling is completed take a pair of fabric scissors and tidy up the raggy ends.
Voila! You have completed the first step! Well done. Have a glass of wine.
Cut the astro turf into 30x30cm squares.

Make two cuts in the centre forming an X big enough for the tree stump to fit through.
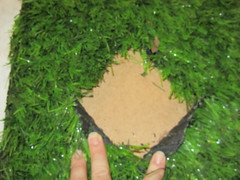
Flip the astro turf over wrong side up and squirt some liquid nails over it, taking care not to stick down the X section. Stick the astro turf onto the base (30x30cm square MDF). You should be able to lift the X section in the middle and place the log directly onto the MDF. You will have some astro turf coming up the sides of the log, but you can just trim that and having a little coming up the sides makes it look more realistic.
Next cover the entire end of the log (just one end for now). Secure it to the base piece of MDF and trim the astro turf.
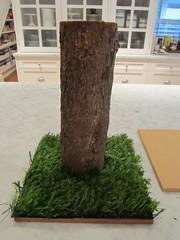
Next take the upholstered seat section. We are now going to attached this to the other end of the log. Cover the exposed end of the log with liquid nails. Don't be shy, apply liberally. Place the seat down on top making sure that it's centred and not off to one side. Check from all sides and top as well.
Where are the nails and screws I hear you ask? I did some research (I spoke to a few chippies) and told them what I planned on making. All agreed that liquid nails was more than sufficient for this job. So no nailing, screwing, drilling or hammering required!!
Let dry for a full 24 hours.
I embellished some with a little blue bird sitting on one of the branches. Some moss and tiny mushrooms on the grass looks very sweet too.

Hope you enjoyed the tutorial. Please feel free to ask any questions.


Genius.
ReplyDeleteKatie
Thanks Sharnel ☺ I must admit I was most impressed with the step involving have a glass of wine. Important to reward yourself along the way and dull the pain of the RSI... hehe ...
ReplyDeleteYou go, girl! Those are terrific! Wine? Well-deserved! :)
ReplyDeletewow! what a great idea. Thanks for the tute.
ReplyDeleteThat is fabulous!!! Saw your post on AFOMT!
ReplyDeleteHope you'll visit my blog too...
ashleypetite.blogspot.com
love it!
monica
I can't wait to make one! Thanks for sharing!
ReplyDeleteI love it!!!! Thanks for sharing! I can't wait to make a couple of these!!
ReplyDeleteGreat step by step Sharnel!! I don't even know what I would need one for, but I somehow want to make one now!! Yours really turned out beautiful!! Too bad I don't live closer, I guess I could just rent yours!
ReplyDeleteThanks for the Tuto, Sharnel... these are great!!
ReplyDeleteSharnel- these were so adorable. Thanks for sharing!
ReplyDeleteWhat a clever chicken you are x
ReplyDeleteAWW! This is so, so cute! Thanks for the how-to, I'll be linking.
ReplyDeleteThanks for the tutorial Sharnel, I love it!! What a fab idea and a top job you did on them all.
ReplyDeleteFantastic!
ReplyDeleteI don't know how thick the MDF you used is but could you perhaps use 12" round cake boards(6mm) ones? would they be sturdy enough?
Hi there, love the toadstools! What thickness are the MDF boards that you used? Thanks, Angie.
ReplyDelete